Photo Organization and Back Up Plans
- On March 02, 2013
- By Jennifer Ludlum
- In Photography Tips
 0
0
Photos are a very meaningful way to preserve special memories of your life. How many people do you know that say one of the first things they would grab if the house was on fire are their photo albums? My Mom is a perfect example of this scenario and I love her for it (I believe our family albums are now in a large fire-proof safe after a scary scenario with the furnace one night – everything ended up being ok).
With this story in mind, I created a service called Making Memories Last where I offer to help organize and preserve your photos and life-long memories. Who doesn’t have stacks of printed photos tucked away in a shoebox or other “temporary” storage space just waiting to be organized chronologically and creatively into a scrap book or album? And while most of us have visions of what we’re going to do with these photos “some day,” most people just don’t have the uninterrupted extra time in their life to actually get it done. That’s why I’m here! To see how I can help you visit http://www.jenniferludlumphotography.com/making-memories-last/
In the meantime, here are some basic tips to help you get started on your own. We all know how easy it is to snap a gazillion (yes, that is a made up word, but you get the point) pictures on a digital camera and then share them with the world. But how well do you keep them organized on your computer? Are they backed up in case your computer crashes? Digital organization and back-up copies are a must!
How to Better Organize Photos on your Computer
#1 Choose a photo organization system that will best fit your needs and equipment. A few options I am familiar with and would recommend include:
- iPhoto on Mac computers – it’s user friendly, fairly intuitive, and if you get stuck there are plenty of video tutorials to help you along (Just Google iPhoto help).
- Folders (My Pictures) – This is the standard filing system on a Windows based computer.
- Lightroom 4 – This is separate software you can purchase to help you organize, rate, edit, and print photos. This software is my favorite by far and offers you a great amount of versatility. There is a bit of a learning curve and you’ll get out of it what you put into it.
#2 Have all your photos (everything you’ve taken on your phone, iPad, camera, sd cards, etc) consolidated into one main place/system on your computer. This process will vary depending on the option you choose above.
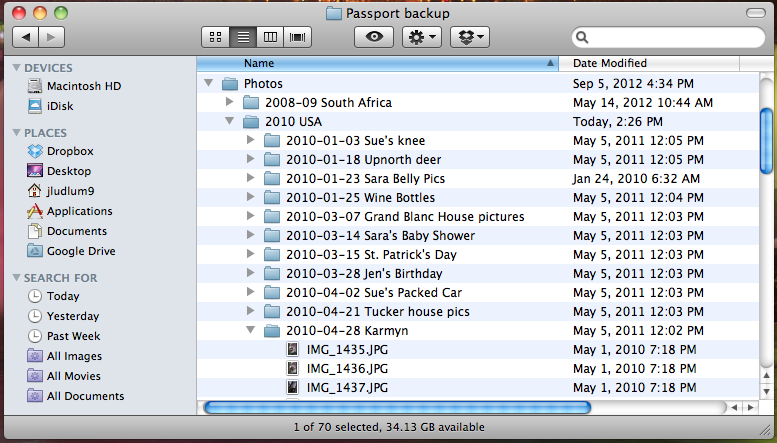
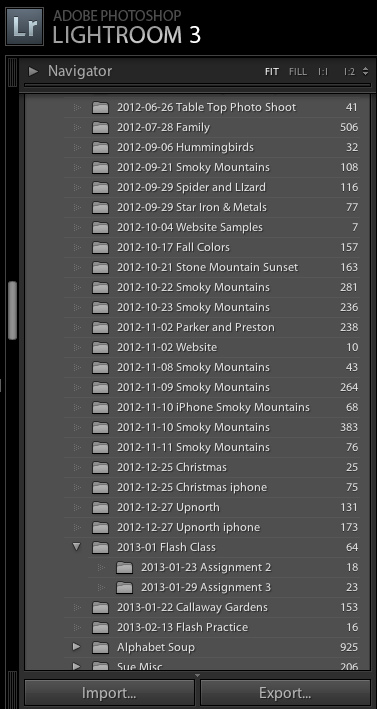
#3 With each of the systems above, the basic organization is with file folders. I suggest organizing your file folders as follows. The images below show an example of each set-up: iPhoto, Folders, and Lightroom 3/4.
- Create and organize folders by date in this format: year_month event description (example: 2013_01 New Year’s Party). You’ll notice in my organization I also add the exact date of the event. That is because I take so many photos and it is easier for me to keep track of. You can also create a folder for each year (example: 2010, 2011, 2012) as my example shows in the second image.

#4 Delete any photos you feel are duplicates or unprintable. This is very important to do every time you add more photos. We all know how easy it is to take a dozen shots of exactly the same thing. Pick out your favorite and delete the rest. Every photo takes up memory on your computer’s hard drive and you may not realize how quickly this adds up until your space is all used up.
Back up, Back up, Back up!
I cannot stress enough how important it is to make sure you have at least one option of backing up your photos. I know someone whose hard drive crashed and they lost all their digital pictures from the past 10 years. Please don’t let this be you!
The key here is to have at least two places where your photos are stored. One option is to store your working collection of pictures on your computer hard drive and select one of the following to use as a back up copy.
- Purchase an external hard drive. I would suggest 500gb or larger. The price has come down dramatically on these products so you should be able to get one for around $50. I use both Seagate and Western Digital and have been happy with both.
- Purchase a package of high capacity cds and burn a copy of all your photos onto multiple cds. One way to do this is to burn each year onto a different cd (this option may or may not work for you depending on how many photos you take and the megapixel size of your camera/photos). An easy way to keep these organized it to print a listing of the file catalog from the computer showing exactly what is burned onto each cd. Then store them in one place such as a plastic bin or cd storage container.
I take one more step in my back-up process. Some may find this a little excessive, but my photos and memories are very important to me. I store an additional copy in a fire-proof safe or another option would be to leave a copy in another location (parent/sibling/friend’s house). This way you will always preserve those memories in a separate location just in case.
Now, I do realize that this stuff takes A LOT OF TIME! And I realize that most people don’t have this extra time because they are doing what is important – they are out there making memories with their families and friends and taking photos of all their experiences. So let me help you make those memories last! Contact me with any questions or for more information on how I can help you with Making Your Memories Last.
Next time, I’ll continue this conversation and write about how to better organize your negatives and prints, scanning, as well as ideas of what to do with your digital photos (photo books, printing, collages, etc). I’d also like to hear from you – please feel free to leave a comment with your favorite tips and tactics for organizing your photos.
If you enjoyed this post, please subscribe to the Jennifer Ludlum Photography email list. You will receive an email when a new blog article is posted. Click this link to subscribe http://www.eepurl.com/t4Aen

Beyond the Usual from 2012
- On February 13, 2013
- By Jennifer Ludlum
- In Photography
- 0
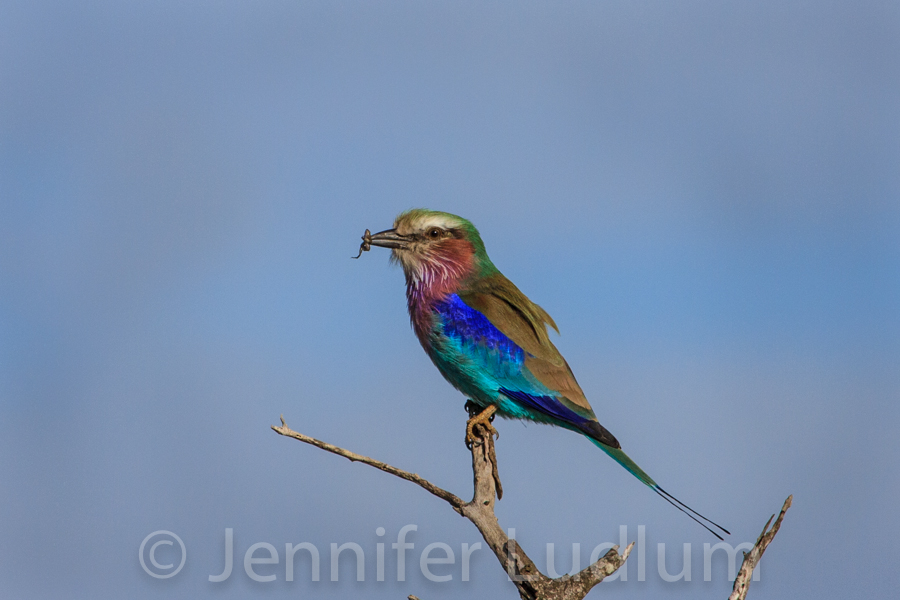
As a photographer, I have a pretty direct style: sharp images, balanced composition, strong subject. During most of the photo shoots I do, I try to experiment and present things outside my regular style (even though I rarely post any of these photos). For me, this pushes my creativity, keeps things fresh, and advances my skills and techniques. It is an important part of what every photographer should do!
Well, I thought it was about time to share a few of these photos. Different photos always appeal to different people in different ways. I was reviewing my work from 2012 and put this collection together. I hope you enjoy them and would love your feedback.
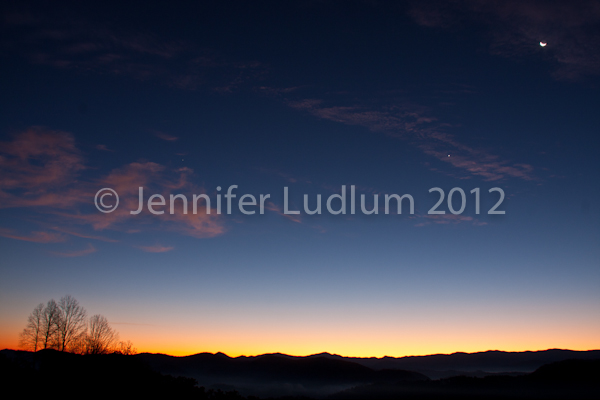
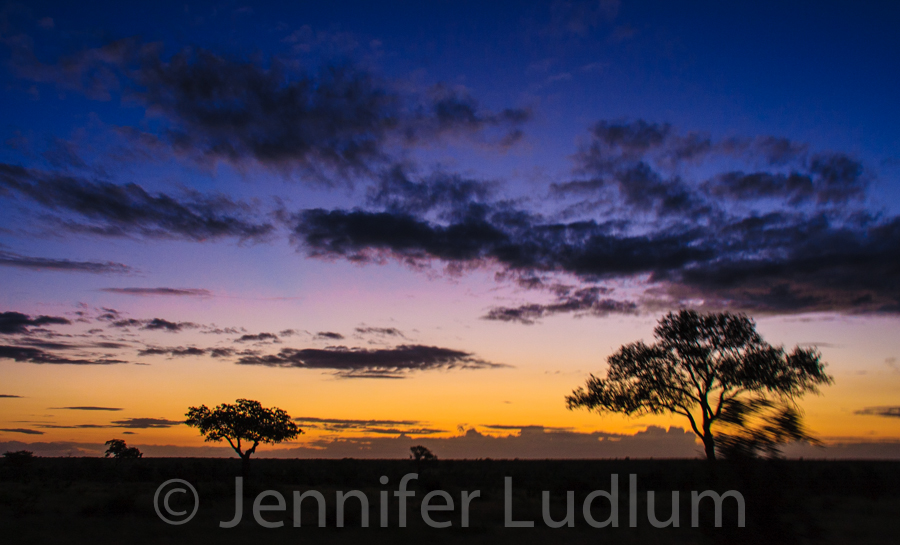
“Sunrise Blue” (f/11, 5 seconds, ISO 100)
This photo was taken along Foothills Parkway in the Smoky Mountains just before sunrise. I have always enjoyed the deep, deep blue color of the sky either right before sunrise or a short while after sunset. The simplicity of this photo is also very appealing to me.
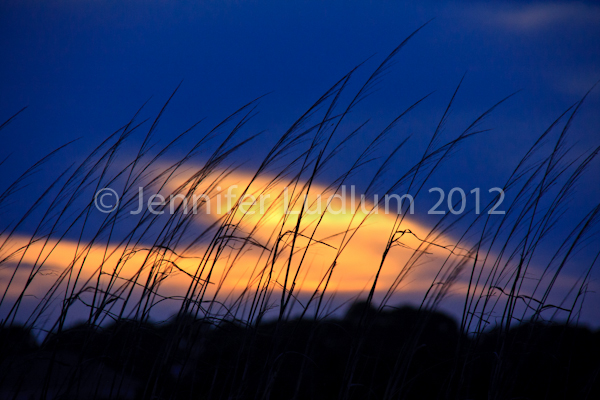
“Dune Grass” (f/7.1, 1/250 sec, ISO 400)
While walking along the beach on Fripp Island, SC just after sunset, I spotted this opportunity. I crouched down very close to the ground to create a low angle and then positioned the last bit of sun right behind the grass silhouette.
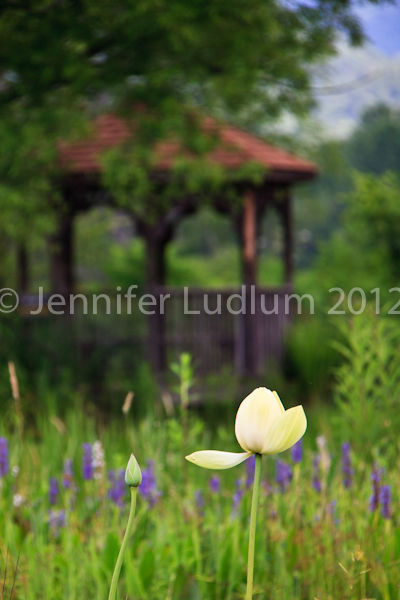
“Flower Garden” (f/5.6, 1/100 sec, ISO 100)
The gazebo is not the main “focus” of this photo but it adds a lot to the composition and helps tell the story. By using a smaller f-stop (larger aperture opening) you are able to have a sharp focus on your subject and blur the background.
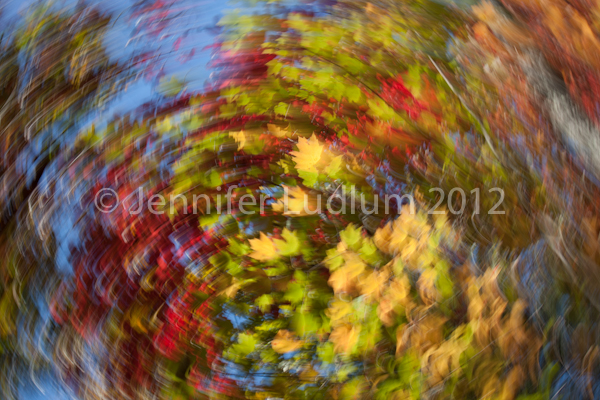
“Color Wheel” (f/18, 1/13 sec, ISO 100)
Let the color wheel spin. This is a very simple technique done by slowing down the shutter speed and giving the camera a slight twist as you take the photo. Very fun to experiment and see what effects you can make happen!
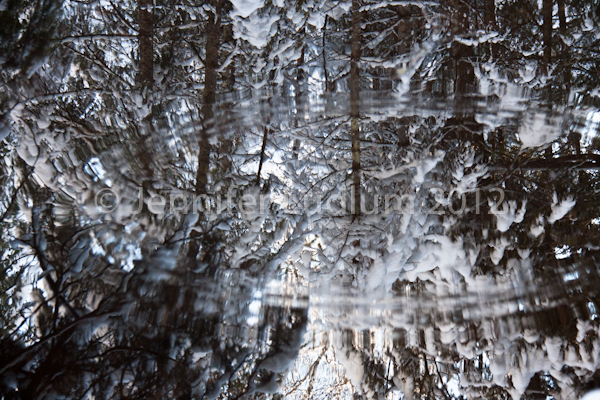
“Winter Reflection” (f/5.6, 1/60 sec, ISO 640)
This photo was taken in a small spring-fed pond in the middle of the woods in northern Michigan. It is a low-lying area filled with tall trees and not much light except the white snow and reflections.
If you enjoyed this post and would like to receive email updates on new posts, photography tips and special offers, please follow the link below to register your email address.
Thank you!
Northern Michigan Snow
- On January 04, 2013
- By Jennifer Ludlum
- In Travel
- 3
Over the holidays I was able to spend a day in one of my most favorite places in the world – our family cabin in the middle of the woods in Grayling, MI. Grayling is a quiet little town a little over an hour south of the Mackinaw Bridge right off I-75. Now that I live in Atlanta, it is very seldom that I get to see snow and I do miss it. My trip up north offered up about 9 inches of beautiful white stuff with gorgeous blue skies. This provided me the chance to play outside just about all day!
Started off the morning with a snowmobile ride. Those of you that like to ride would love the miles and miles of groomed trails as well as off the beaten path trails.

In the afternoon, I strapped on my camera bag and went for a hike through the woods with an eventual destination being the Au Sable River. The Au Sable is a hot spot for trout fisherman and canoe/kayaking. I would have loved to fit in a winter kayak trip but ran out of time. Below is the gorgeous forest I hiked through.

As a child I used to wander through these woods all the time. One of my favorite spots to hike is down to the swampy area where a natural spring feeds into the beginning of a little creek. The smell and feel down there is so unique, love the cedars and their smell. I couldn’t have asked for a more picturesque welcoming when I arrived. The water was like glass and an amazing reflection showed of the snowy trees and blue sky above. It is so amazing in the winter with the contrast of pure white snow and bright green moss.

My final destination was to the best swimming hole on the river – the Whirlpool. There are times when it is so cold that only a very small channel of water is seen, the rest is frozen and snow covered. I’ll have to post one of those photos some day. But on this day, it was a very serene, peaceful place.

Travel Tips for the Great Smoky Mountains
- On November 16, 2012
- By Jennifer Ludlum
- In Smoky Mountains
- 2

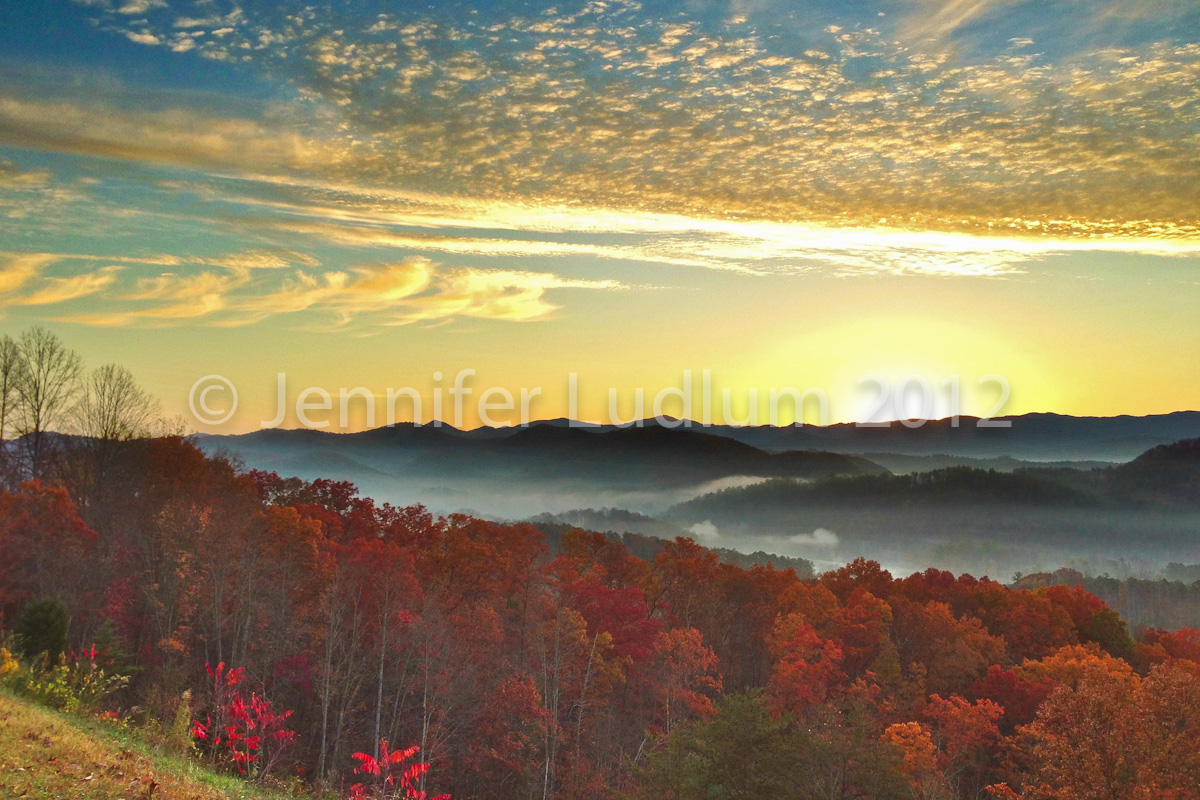
Recently, I have had the opportunity to visit the Great Smoky Mountain National Park twice. The first trip was during peak fall colors (third week of October) and last weekend (November 8-11).
This entire period is an amazing time to visit the park because there is such diversity in the activities you can do. For fall colors, I would definitely recommend going during the week if at all possible. The traffic on weekends really detracts from the beauty around you. Traffic slows down a little in November, but remember that this is a very busy national park all year round. One perk of visiting the Great Smoky Mountain National Park is that there is no entrance fee required whereas a majority of the other national parks around the country charge a daily fee. However, it is a very kind gesture to leave a donation to help support the park.
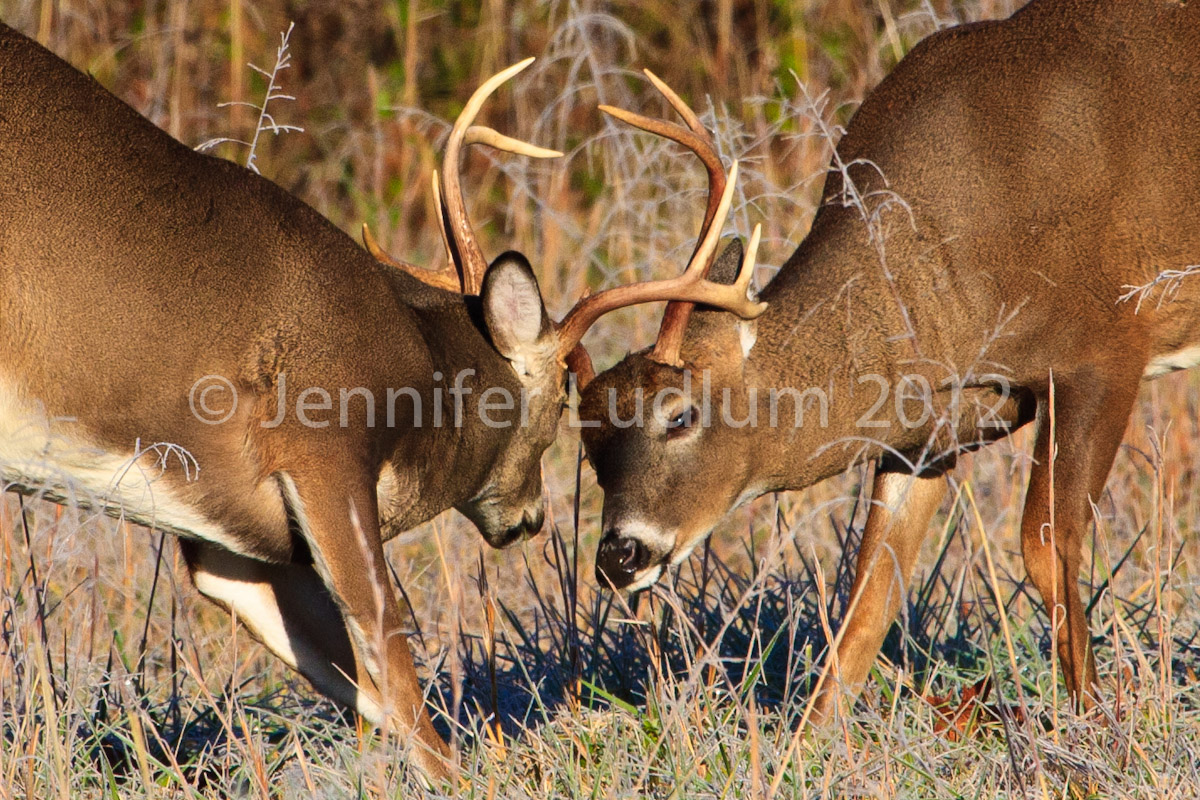
In late fall, the wildlife is very active and fun to watch. The deer are in rut which means you could see a lot of sparring between the male bucks as they fight for their choice of ladies for mating.
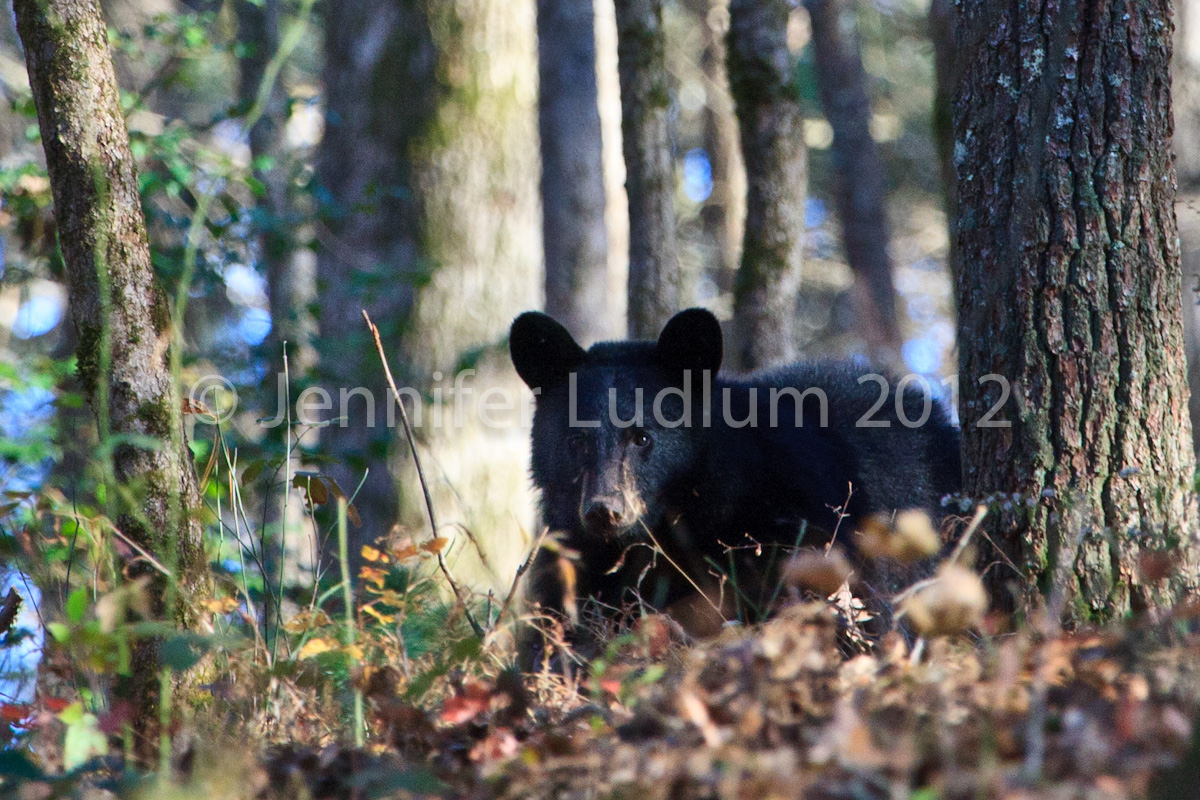
The bear are also active, eating as much as they can in preparation for the winter months ahead.
Turkeys are abundant as well – no worries for them about being the next Thanksgiving dinner as there is no hunting in the park. You may get lucky and spot an un-common Smoke-phase Gray Turkey like the photo below. This color variation is due to a recessive gene and is a very beautiful sighting among a crowd of your usual brown turkeys.

Depending on what type of activities you like, two nearby towns to consider visiting on the Tennessee side are Townsend and Gatlinburg. Townsend is a small, quiet town with easy access to the park. It has a few hotels and restaurants with an overall quiet feel. Gatlinburg, on the other hand, is much more touristy with many more restaurant and shop options.
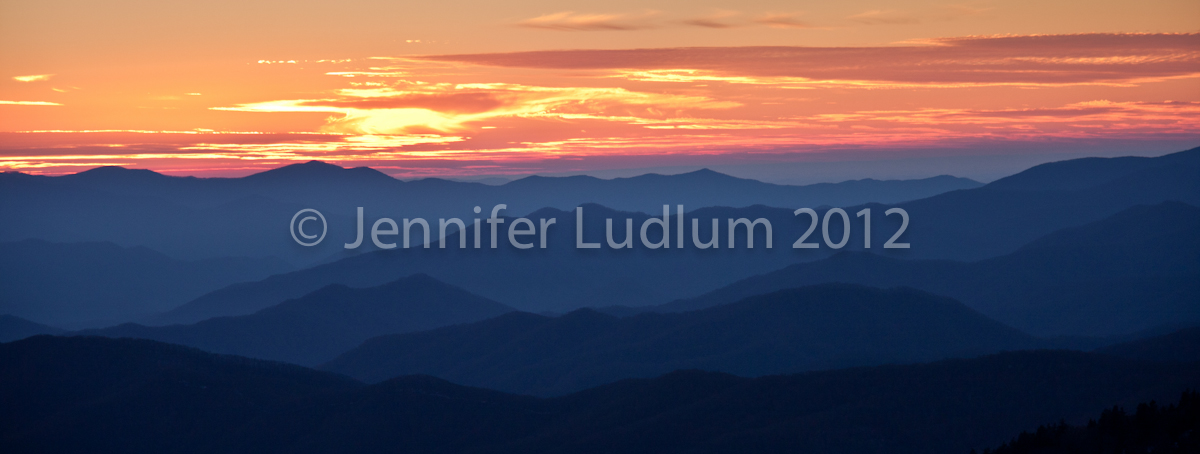
A few suggestions I have for places to visit would include Foothills Parkway for sunrise, Cades Cove in the morning fog, and Clingman’s Dome for sunset. Head out of Townsend and take a left onto Foothills Parkway. The first pull-off on the left offers a great easterly view of the mountains for sunrise. Find out what time sunrise is and plan to arrive at least 30 minutes prior to that. The morning twilight can be so peaceful and beautiful.
Cades Cove is also an excellent early morning drive. It is an eleven-mile one-way loop that has great scenery, especially when the fog settles in the morning. The gate to Cades Cove opens at sunrise and you will see a line up of cars waiting to enter. Cades Cove is where you will see most of the wildlife activity and just after sunrise or just before sunset is usually when the animals are most active.
A nice place to visit in the early evening is Clingman’s Dome. This is the highest point in the park with an elevation of 6,644 feet. Bring extra layers as the wind is often strong and the temperature is much cooler as elevation increases. A short, half-mile hike from the parking lot takes you to the top observation tower for a nice view. But in my personal opinion, I enjoy viewing the sunset from the parking lot. It is a great westward view.
Thank you for your time and interest in my work and as always, your comments are welcomed and very much appreciated.
I apologize for the watermark through the middle of my photos but, unfortunately, I found it is necessary to protect my work.
Photo Shoot with my Nephews
Last week I visited my family in Michigan – it is such a treat to spend time with them. My two nephews, Parker who is 7 months and Preston who is 2 1/2, kept me very busy. I feel that we fit four months of play into the five days I was there! And you guessed it, a visit with the family doesn’t come without at least one photo shoot with the boys.
Most of the photography I do is landscape and wildlife, but I always enjoy the opportunity to work with young kids and put my creative side to work. I’ve learned there is a big difference in having patience as a wildlife photographer (I could spend hours sitting in a bird blind waiting for the right shot) and the patience necessary when working with toddlers. Sometimes you get the photo you envisioned and many times you don’t.
Here is one of my favorites from this trip.

One of my goals during my visit was to get a nice picture of the boys together that my sister could use for a holiday card. It took us longer to get the boys dressed than the entire photo shoot actually lasted! I am a fan of more candid, interactive shots than I am of the kids looking directly at the camera. I usually like to set up a scene or possibly use small props, but to me some of the better photos are like the one below.

Here are a few more shots of Parker with a winter scene set-up and some Christmas lights. Preston is at the age that he is not so interested in smiling for the camera but he was a great helper and made his brother laugh better than anyone else could!


What great fun it was to spend time with my family and continue to come up with fun ideas for photos of my nephews!
Follow Me!