Photographing a Colored Powder Fight with Kids
The photography that I enjoy the most is landscape and wildlife, but I never give up the opportunity to do a photo shoot with my nephews. This summer, I wanted to try something fun and creative. The idea of Color Runs and the Holi Festival of Colors have become very popular recently. Because of this, I have seen many blog posts from photographers doing engagement photo shoots using the colored powder but not much at all with kids. Let me tell you about our experience and offer some ideas for you to try.
Because I was working with younger kids (age 2 and 4 years), I started off by showing them some photos and videos of a colored powder fight. This gives the kids fun ideas and helps as you encourage/instruct them to do certain things. It also builds excitement and anticipation of the activity.
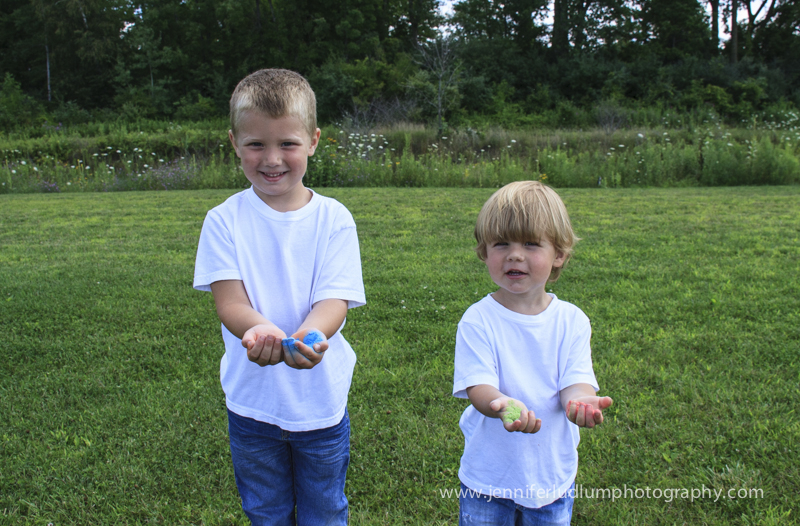
First and foremost – make sure you get a “before” picture of the kids in their white shirts and all clean! I love the look of a white t-shirt and jeans for this activity. If the parents are going to get involved I would have them wear the same. It makes for great family photos!
I suggest finding a large field with a natural background of trees and bushes. This makes for much nicer photos than a background of houses, buildings, equipment, etc. If you can plan it near a lake and the kids can go for a swim afterwards, most of your clean up is done for you!
An easy way to start is to let the kids throw the powder up in the air, rather than at one another. They get the feel for it and get a little colored at the same time.

Make sure the powder you purchase is safe for children and won’t bother their eyes or in case they get it in their mouths. Many of the homemade recipes are made out of cornstarch. The powder I purchased online (a quick Google search will give you countless options of where to purchase) was not harmful to the kids but it doesn’t mean all of them will like it when thrown in their face. An option is to have the kids wear goggles to make sure it doesn’t get in their eyes.
It is fun to include the parents and let them be a part of the photo shoot or have them help manage the distribution of the powder. Plastic containers work well to store the colored powder, a different container for each color. This allows the kids to reach in for a handful or the parents can pour small amounts in their hands.
The kids will naturally start to throw it at one another and begin to show their true colors.
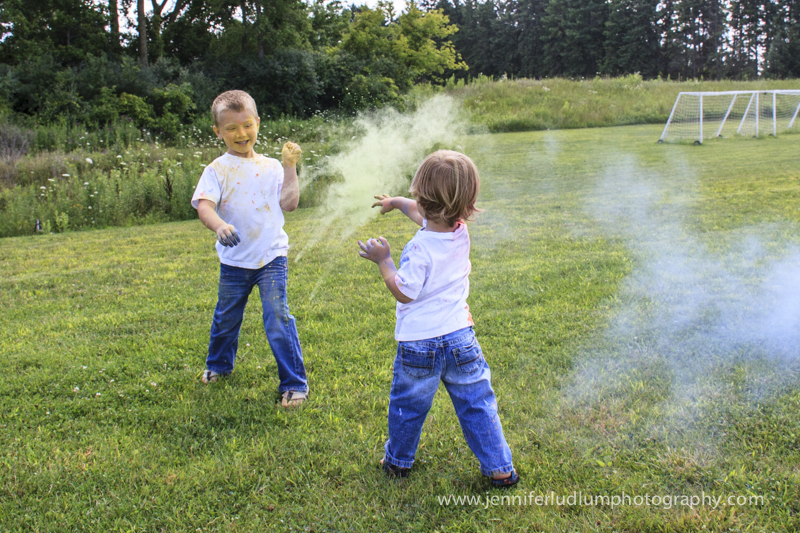
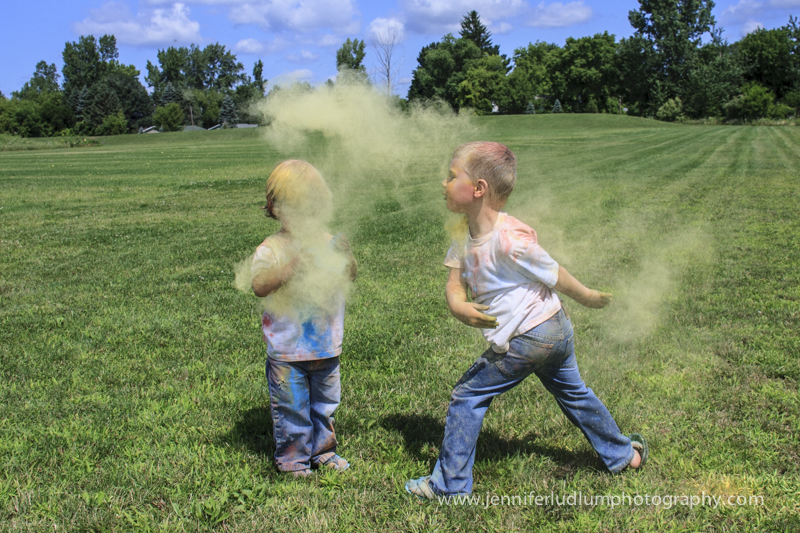
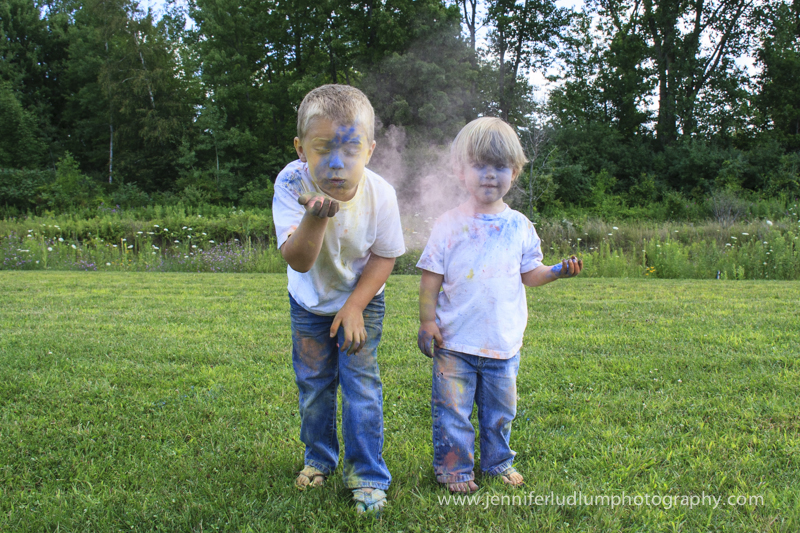
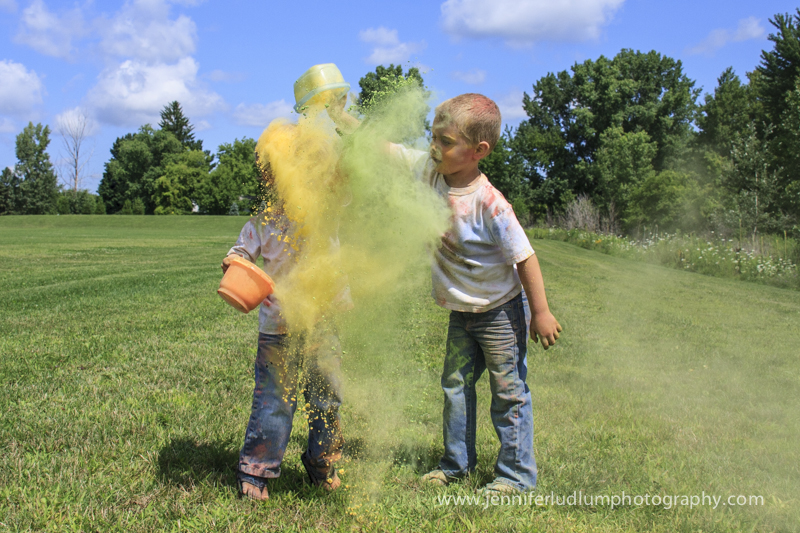
Another good photo op is to have the kids put powder in their hands and blow it at you. Warning: make sure you and your camera are far enough back as the kids naturally tend to come toward you.
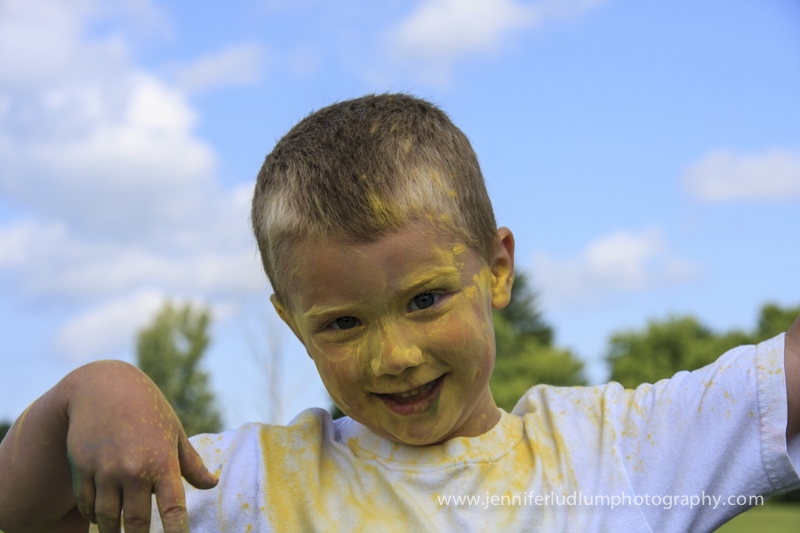
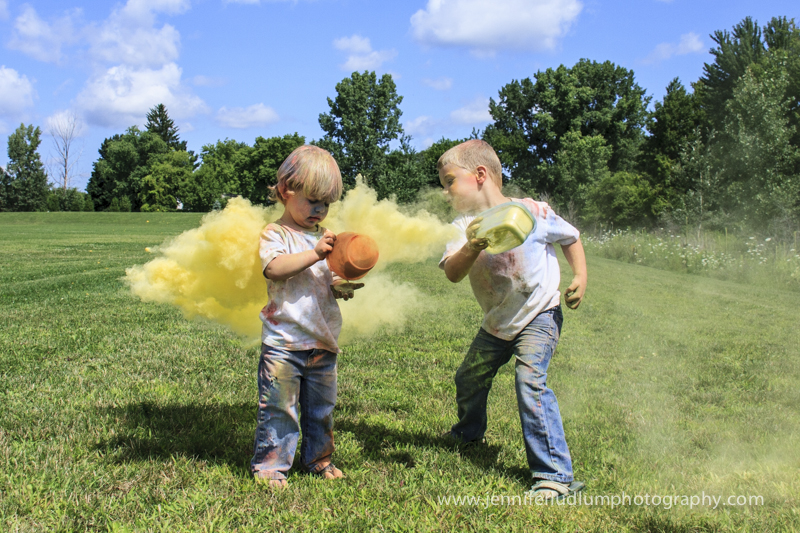
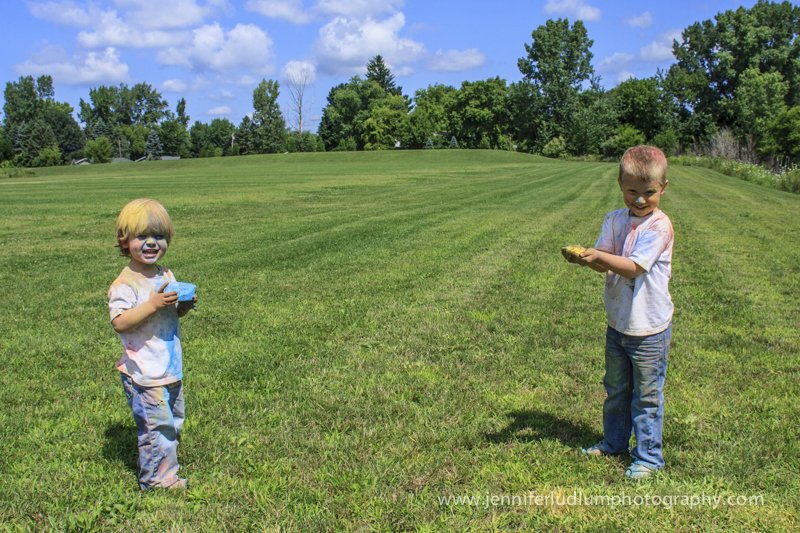
Toward the end, we let the kids take what ever was left in the containers and do with it what they wanted. As you can see, the older kids usually make out better in this situation.
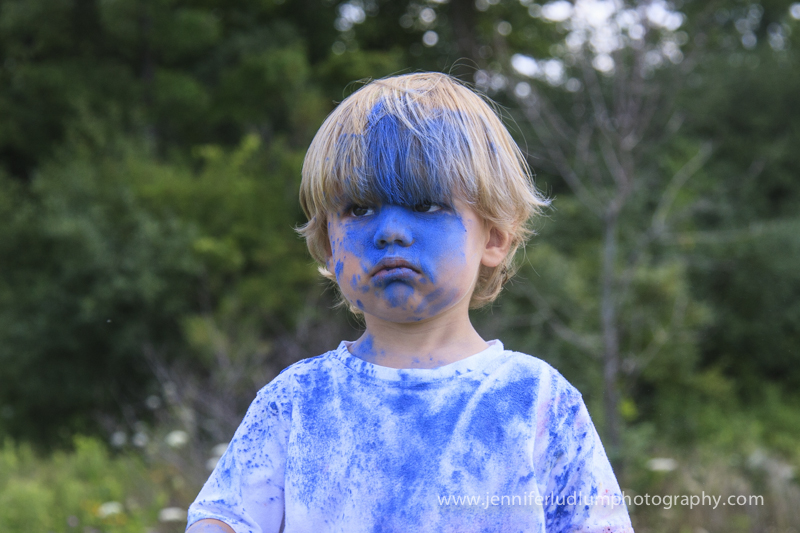
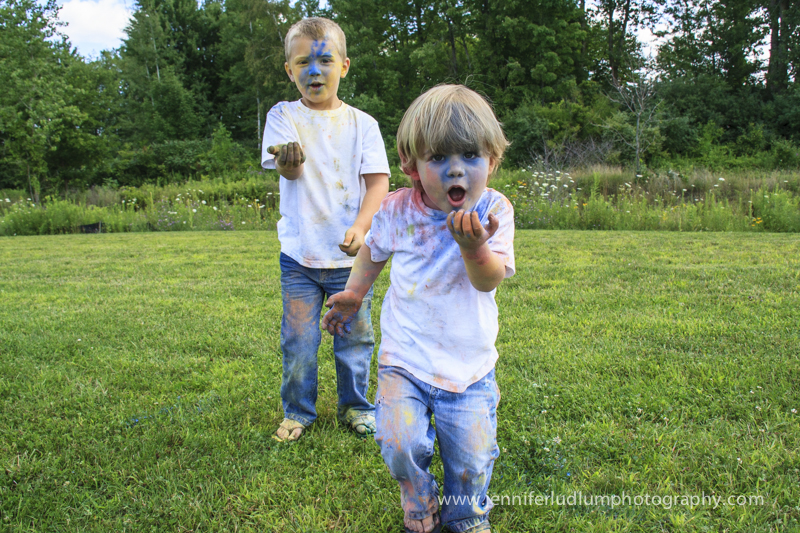
It is such a fun activity and allows you to capture the authentic smiles and reactions of the kids. I smiled and laughed out loud the entire time I was post-processing the photos! Pure joy was all over my nephews’ faces (except when you get a large handful of blue powder directly in the face).
As far as clean up goes, we found that while the powder is dry it shakes off fairly easily. So we brushed it off their clothes and out of their hair. Then we brought out the wet wipes to clean up for lunch and it got a little messier. I suggest bringing a change of clothes and towel to sit on in the car for the ride home to the bath tub.
Photographic details: I used a Canon 40d with an 18-200 mm lens. I found the zoom lens to be very useful to allow me to keep my distance but also get close-ups when necessary. I shot in aperture priority at f/8 with the ISO on automatic. Make sure you have your drive mode set at continuous shooting. In continuous shooting mode the shutter keeps firing for as long as you depress the shutter button. This allows you to capture great sequence shots and not miss a second of the action!

South African Sunrises and Sunsets
- On May 21, 2014
- By Jennifer Ludlum
- In Travel
 3
3
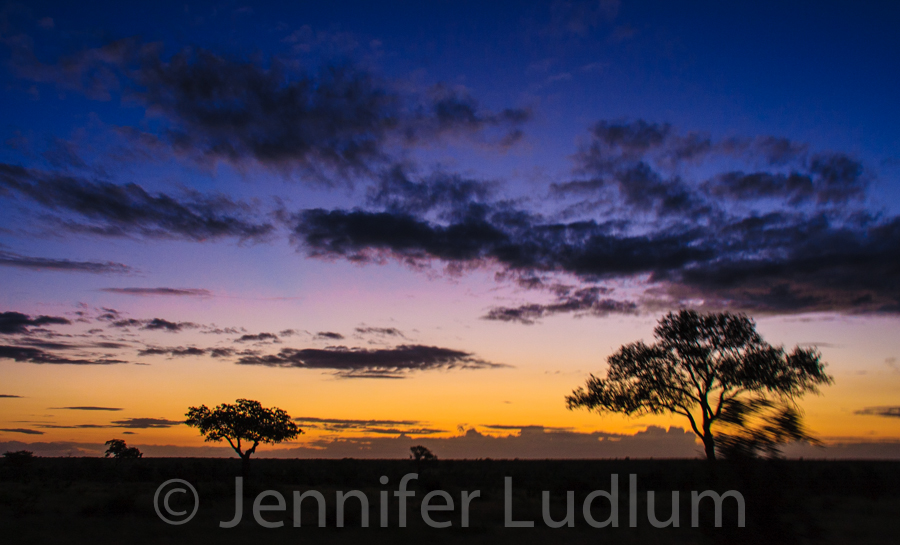
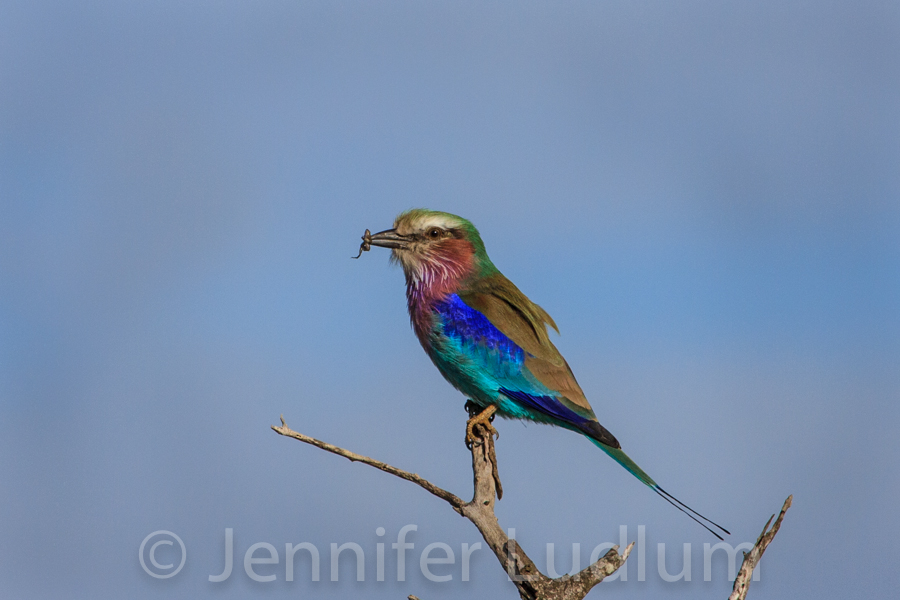
There is something magical about that special time in the morning when the sun rises bright announcing a new day and again in the evening when it disappears below the horizon. Living in Atlanta, I struggle to find many places I can truly enjoy the beauty of a the sunrise and sunset. In April, I spent two weeks traveling across the country of South Africa. The trip started in Cape Town, then enjoyed a visit to the Winelands, a drive on the Garden Route to Port Elizabeth and ended in Kruger National Park. No matter where we were, the sunrises and sunsets were spectacular!
This blog post is a tribute to the beauty and magic of the many different sunrises and sunsets I experienced over a two week span.
Enjoy!
March 30, 2014 Sunrise
Simon’s Town overlooking False Bay
March 31, 2014 Sunrise
Simon’s Town overlooking False Bay

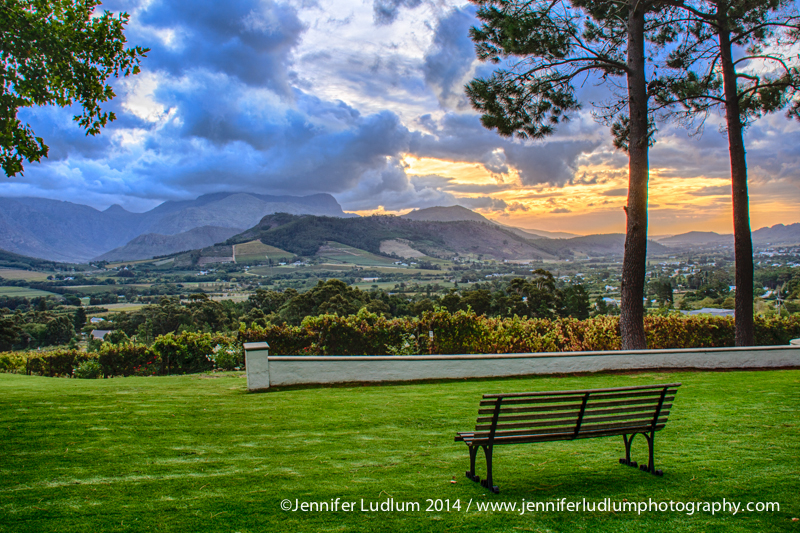
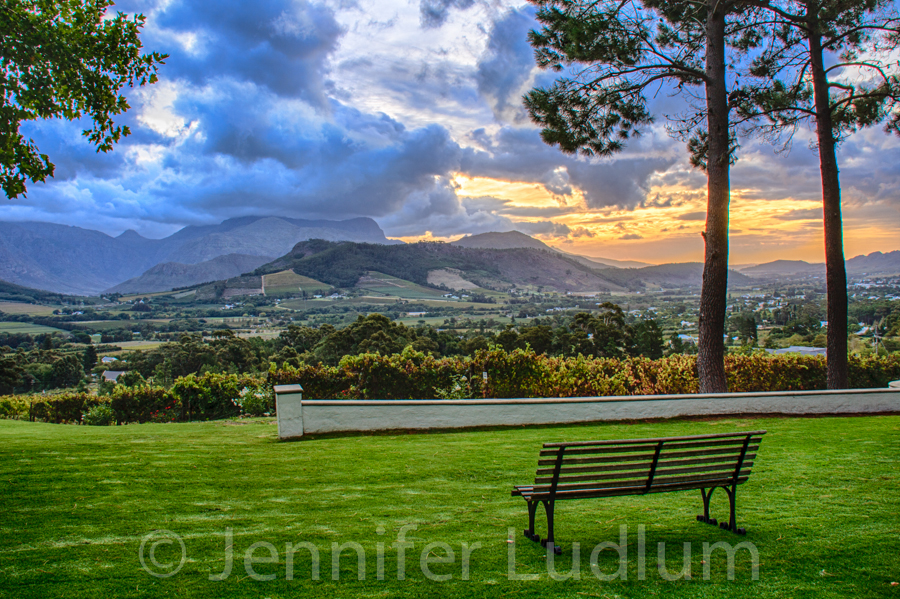
March 31, 2014 Sunset
Franschhoek, Winelands of South Africa
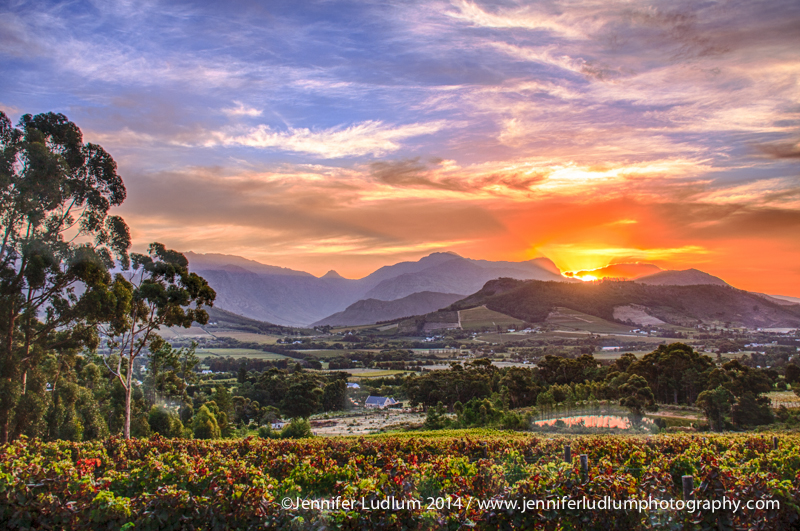
April 1, 2014 Sunset
Franschhoek, Winelands of South Africa
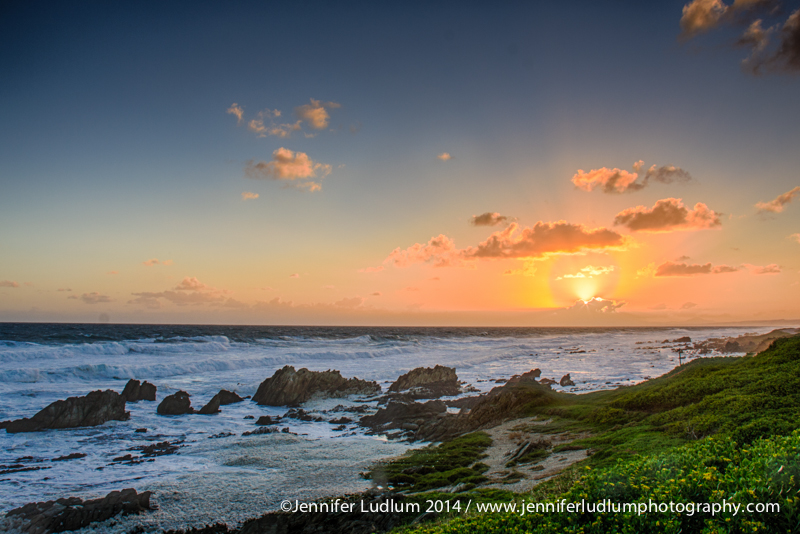
April 3, 2014 Sunset
Seaview, South Africa overlooking Indian Ocean

April 4, 2014 Sunset
Seaview, South Africa overlooking Indian Ocean
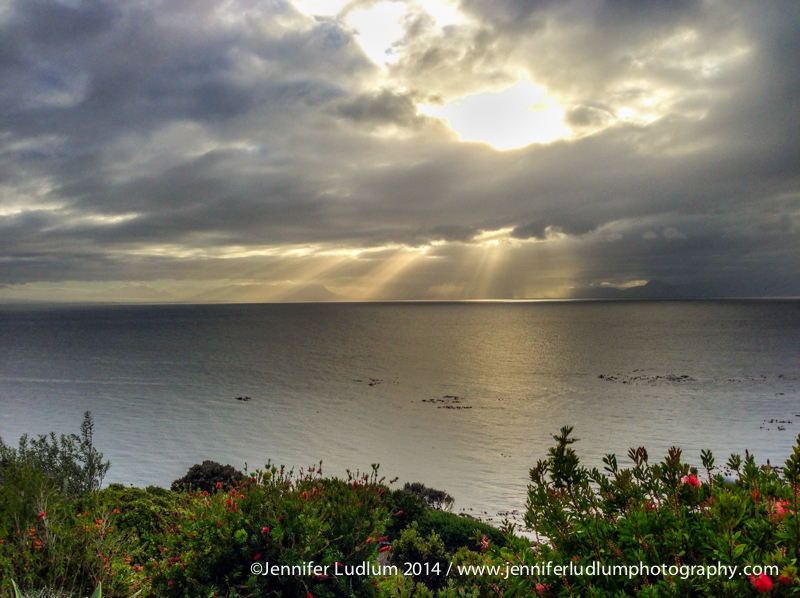
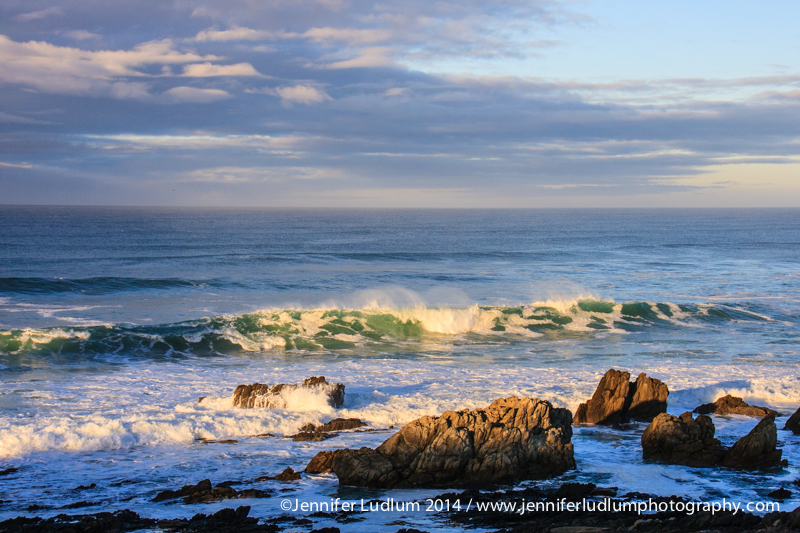
April 6, 2014 Sunrise
Seaview, South Africa overlooking Indian Ocean
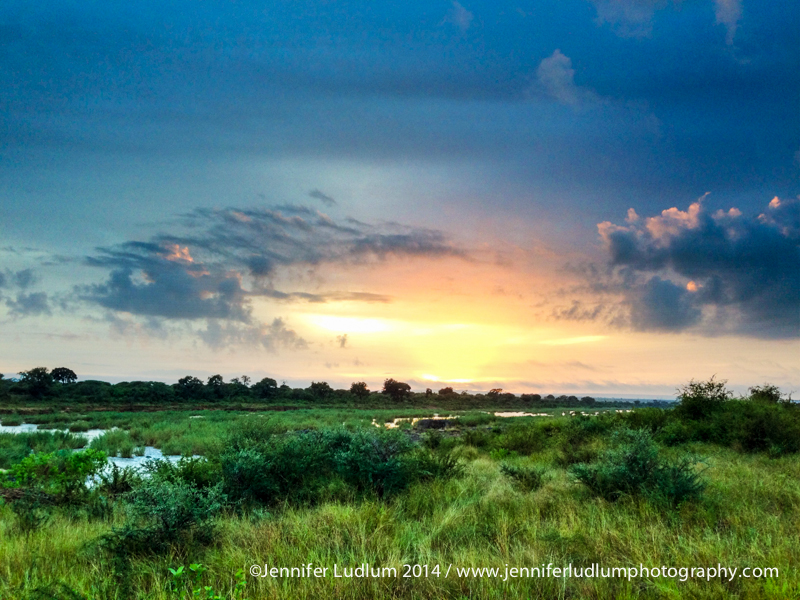
April 9, 2014 Sunset
Kruger National Park
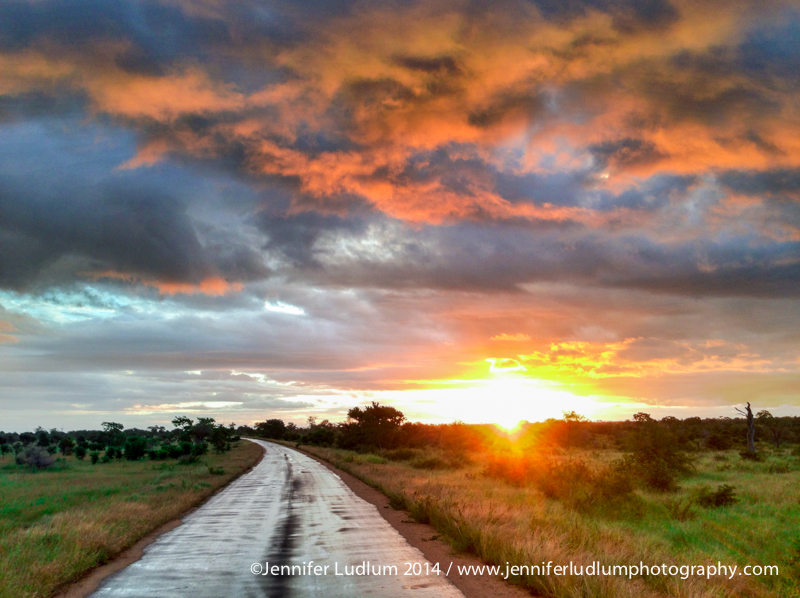
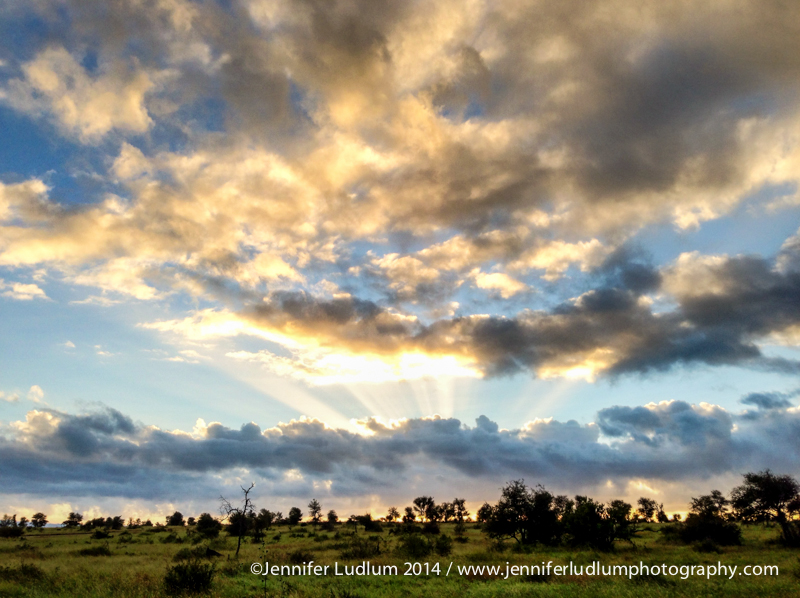
April 10, 2014 Sunrise
Kruger National Park
April 10, 2014 Sunset
Kruger National Park

April 11, 2014 Sunrise
Kruger National Park
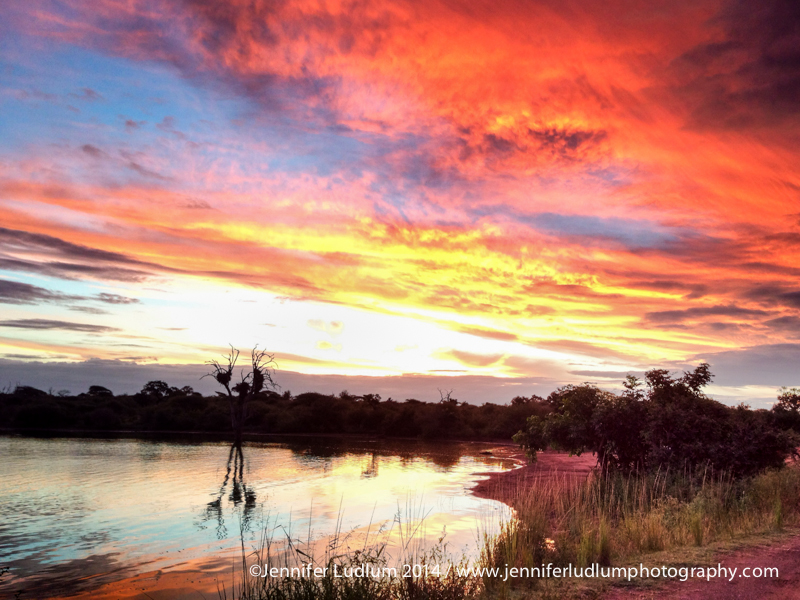
April 11, 2014 Sunset
Sunset Dam near Lower Sabie, Kruger National Park
These images along with many others from the trip are available for sale on my website. Please feel free to peruse the gallery.
Photographing Fireworks
- On July 01, 2013
- By Jennifer Ludlum
- In Photography Tips
- 0
Happy Fourth of July! This time of year brings picnics, celebrations, the American flag and fireworks. I know that in Atlanta alone, you can watch at least eight different fireworks displays within an hour drive.
For those of you interested in photographing the fireworks, here are a few tips that might help you capture the beautiful display in the sky you were hoping for. Please remember that every situation and light condition is different. These are just basic guidelines and it is important for you as the photographer to make changes as your conditions vary.
Recommended Equipment
- dslr camera
- 18-200 mm lens (any lens within this range will work nicely)
- tripod (very important because the slightest movement or vibration will cause blur)
- cable release/remote (to help eliminate any movement of camera)
Location
The first thing I would suggest is to find a good location. Scope out the location prior to the event and find out exactly where the fireworks will be set up and the direction in the sky they will be displayed. Make sure you will have an unobstructed view and people will not be in your way. Here are some location ideas and things to keep in mind:
- On the ground in the center of the action with the firework display directly overhead
- Elevated on a hillside overlooking the action (people, lake, city, etc.)
- Try to stay away from artificial light sources if possible
- Some of the more unique photos I’ve seen include some additional element in the photo such as a landscape feature, silhouette of people, buildings, or water
- Another thing to keep in mind is the orientation of your photos – will you shoot vertical or horizontal?
Camera Settings
Aperture: Anywhere between f/8 and f/16 will work. You can experiment and find what is right for your setting.
Shutter Speed: Experiment with this setting to get the effect you want. I would suggest using the bulb mode. With the bulb setting, the shutter opens the first time your press the shutter button and closes when you press it a second time. This way you can leave the shutter open long enough to get the entire burst of fireworks. If you decide not to use the bulb mode, I would suggest a shutter speed of anywhere between 1-4 seconds depending on your light conditions and other camera settings.
ISO: Anywhere between 100-400, the lower the better. The higher the ISO, the more probability you will have noise in your photo depending on your camera and its ability.
White Balance: Set to auto.
Flash: Make sure your flash is turned off.
Additional Tips
Your camera’s auto focus will have a very hard time getting a focus point in low light. I would suggest using manual focus. You can set the camera to auto focus to initially get it focused on something in the far distance (close to infinity) and then switch it back to manual focus.
In the very beginning, take a couple of shots and then check your lcd to make sure everything looks good. Check periodically throughout the shoot but it is not necessary to check after every photo. You may miss a lot of the action doing this!
Enjoy and have fun!!!

Wildflowers of the Smoky Mountains
- On May 16, 2013
- By Jennifer Ludlum
- In Smoky Mountains
- 3
In the end of April I took my first spring trip to the Smoky Mountains. The thing I love the most about the Smoky Mountains is that each season offers something new and magnificent to observe (and photograph in my case). I went with an open mind and an open agenda but having two specific things I wanted to photograph – wildflowers and waterfalls.
Smoky Mountain National Park distributes a seasonal newspaper that has great tips on locations of wildflowers. It will suggest various trails to hike and places to look. I highly suggest reviewing this newspaper as a starting point. There are also many great identification books sold in the park bookstore. The one I enjoyed the most is “Wildflowers of the Smokies” by Peter White.
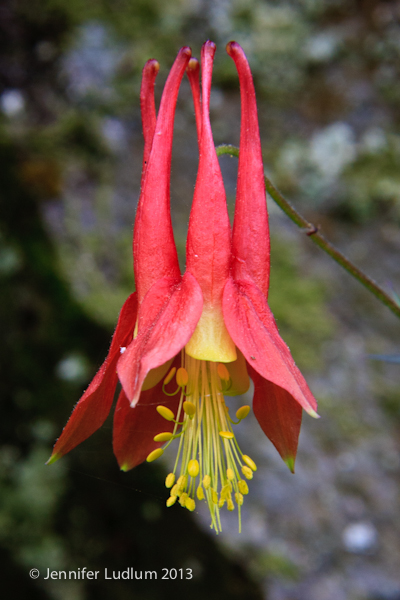
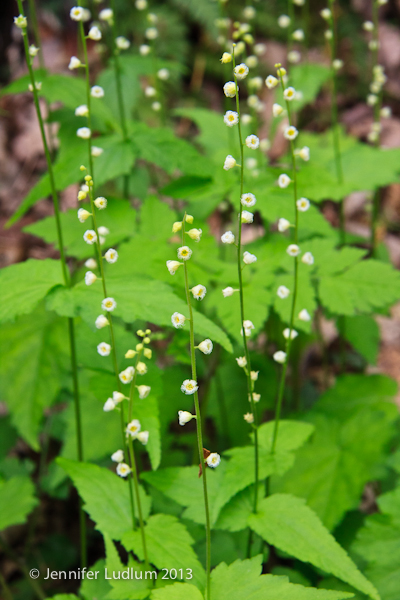
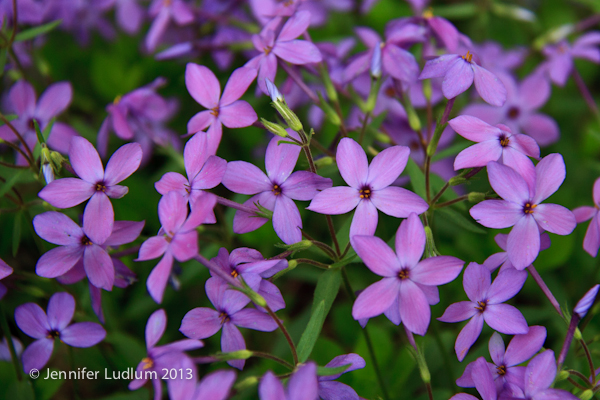
Photographing wildflowers is not a new subject matter to me but the identification of each flower is. Below are a variety of what I found. I hope you enjoy the color and intricacies of each flower as much as I do.
Fire Pink (f/6.3, 1/400 second, ISO 400)

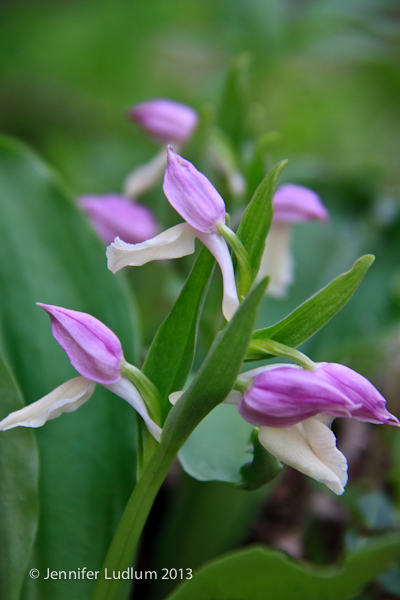
Showy Orchis (f/5.6, 1/200 second, ISO 400)
Columbine (f/18, 1/100 second, ISO 800)
Bishop’s Cap (f/14, 1/100 second, ISO 640)
Pretty Purple Flowers (f/5.6, 1/400 second, ISO 400) – unsure of name of this one
Basic Tips on Photographing Flowers
- On March 22, 2013
- By Jennifer Ludlum
- In Travel
- 0
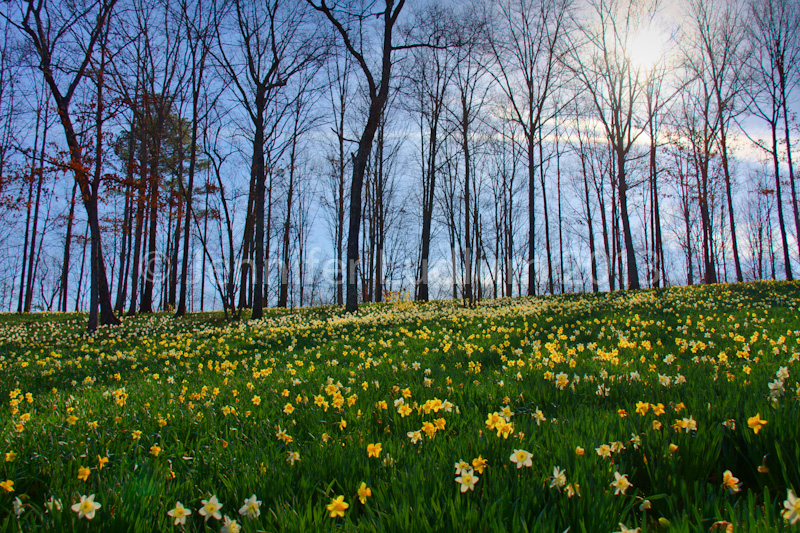
I visited Gibbs Gardens in Ball Ground, GA, which is a little over an hour northeast of Atlanta, during their Daffodil Festival. They estimate approximately 16-20 million daffodils displayed over 50 acres. If you enjoy seeing nature come to life and the transition of winter into spring, this is a great place to visit. I have to imagine if you visited the gardens once a month, each visit would be a completely different experience. I can’t wait to go back when the rest of the gardens begin to bloom.
Below are a few images and basic tips to help you think a little differently the next time you are taking a photo of a flower. Enjoy and happy spring!
“Hills in Bloom” (f/5.6, 1/3200 second, ISO 125)
“In all Her Glory” (f/8, 1/125 second, ISO 100)
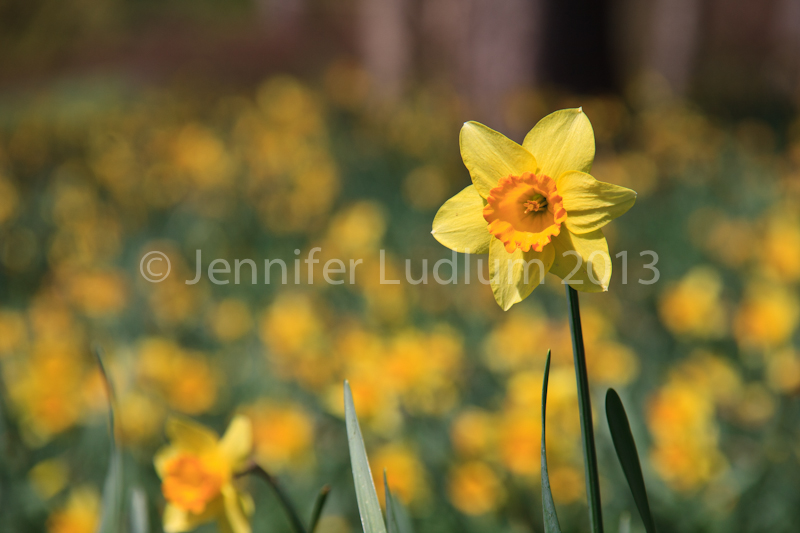
There are a couple of things to keep in mind when trying to get the effect as seen above, a single flower in sharp focus and the background blurred.
- First, try to find a subject that has some distance from it’s background. In nature, your subject may not always cooperate so it is important to also understand the next two points.
- The next step is to choose a larger aperture. For this photo, I used aperture priority mode on my camera and set it to a larger aperture (smaller f/stop number).
- Another technique you can try is to use a lens with a longer focal length (a 200mm lens versus a 35mm lens). With this technique, you will need more distance between your camera/lens and the subject to get the same angle or perspective you are hoping for.
“White on Blue” (f/5, 1/2000 second, ISO 125)
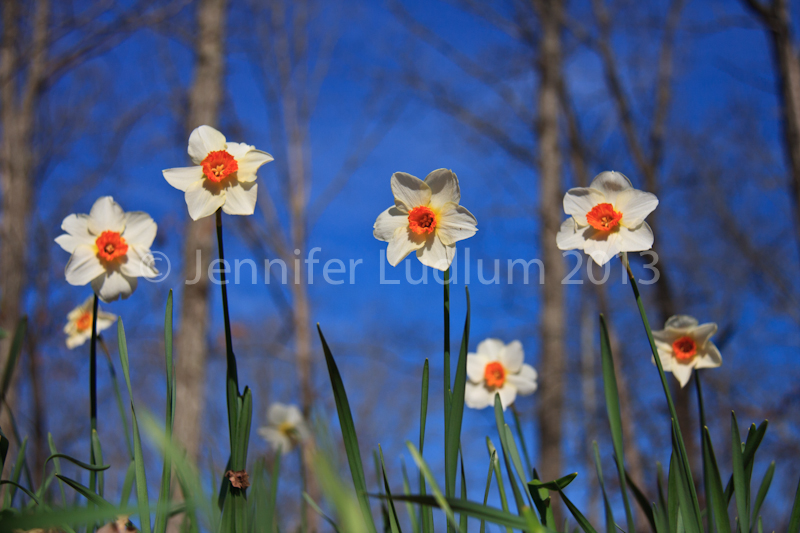
Another very important tip to remember is to always think about different camera angles. Instead of taking pictures always in the same position, standing up with camera at eye level like you see a majority of people doing, change your position. For the photo above and below, I was laying on my belly, as close to ground as I could to get the proper angle. I’m sure a few people probably gave me funny looks but I was able to achieve the angle I wanted with the blue sky in the background.
“Reaching for the Sun” (f/8, 1/160 seconds, ISO 100)
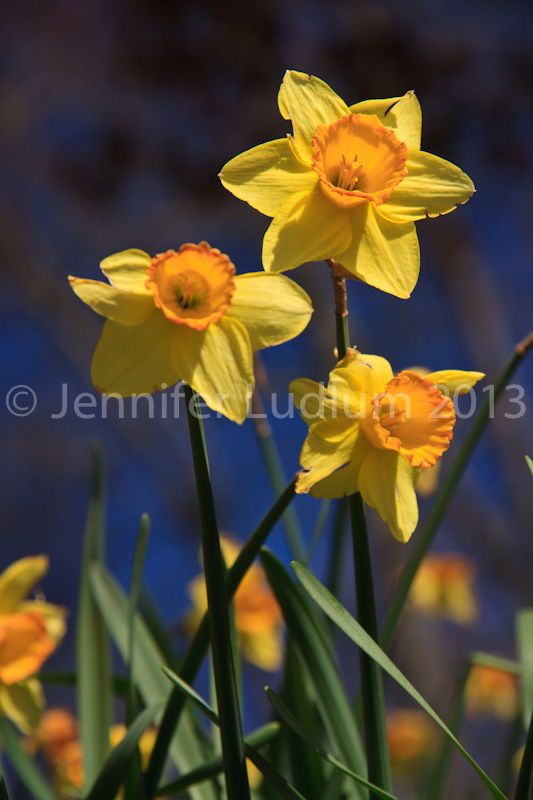
“Brilliant Yellow” (f/5.6, 1/800 seconds, ISO 125)

A last quick idea on how to create the image you see above. ALWAYS pay attention to your lighting. Lighting in a photography is everything! The daffodil above is illuminated by the sunlight because I was able to get to an angle in which the sun was behind the flower lighting it up from the backside.
If you enjoyed these images and basic quick tips, please feel free to share this post. You can also sign up to receive future posts by clicking the following link
Follow Me!